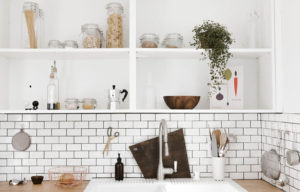
Tiled walls with time can look faded and dirty, caused due to the discoloration of the grout and mold deposits the over time, which are almost impossible to remove with grout cleaning or reviving mixes. If you have discolored, moldy and even pieces of grout chipping away your best bet is to remove the old grout and replace it with new. Do not worry its actually a very easy job, if you take your time.

So lets get to it! You will need the following tools and materials:
Tools:
Handheld grout saw to remove the grout found here
Protective eyewear
Gloves
Rags or paper towels
Grout Float, for bigger areas choose a 4×9 for small areas you could use a plastic putty knife
Sponge
Materials:
Pre-mixed grout
Caulking if needed
Step 1
Put on the protective eyewear and gloves.
Take the handheld grout saw and start scraping downwards through the middle of the grout line, make sure the flat of the blade is against the grout. Only after you have a nice grove, (usually 5-6 scrapes) in the grout seam you can using a sawing motion. Do not start with a sawing motion right away since the grout saw might slip off and scratch the tile surface or even chip and edge.
Step 2
You do not have to get all the grout out, remove about half or a little more then a half of the amount of grout that is in there, so that there’s enough room to fill up with the new grout. Important tip, once you have a nice amount of grout removed out of the grout line, you can slightly angle the grout saw using downward motions to remove the grout stuck on the sides of the tile. By doing that, you will open up the grout line even more, and allow for better bonding of the new grout.
Step 3
Apply the pre-mixed with a grout float, start small. Take a little grout on the grout float edge (about the size of a golf ball), using the grout float with grout on press and wipe perpendicularly to the grout line, so that the grout gets nicely in the seam. Once there’s enough grout in the seams, wipe the grout float diagonally across the tiles to avoid dragging the new grout lines, while keeping the grout float at a 45degree angle. Make sure you fully fill the grout joints to avoid shrinkage or cracking. Continue until you filled all the joints.
Step 4
Once you have the grout in place clean up the grout excess using a wet very well squeezed sponge. If while cleaning you removed any grout by accident use your finger or grout float to add some more. Let the grout set for about 20-30 min (instructions will be provided on the grout bucket). After the grout is completely dry, you will notice a layer of duct covering the tile surface, after a couple hours when the grout joints are completely you can use a soft clean cloth to polish off the grout dust, that will leave a nice finish.
Step 5
After cleaning up the tiles, if you need to re-caulk the joints at the tub or shower, use the instructions provided Here.